How I Made A Framed Peg Board

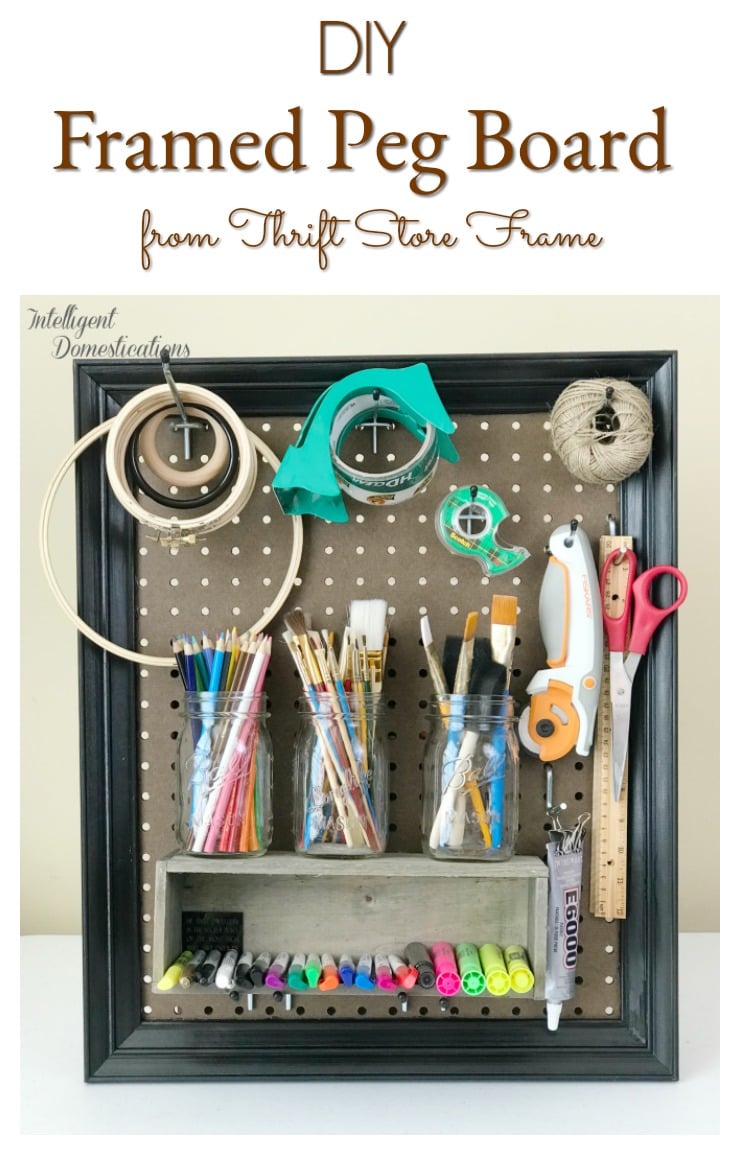
My craft room is in the middle of a much needed makeover with limited surface storage so I decided to make a framed pegboard as a solution.
A peg board is quite handy for storage space in any area of the home.
This project is part of the Craft Room Makeover Challenge I participated in along with a group of talented DIY bloggers. We all needed to start the year off with a well organized craft space so we got to work and allowed ourselves the month of January to get the job done.
4 Week Craft Room Makeover
Craft Room Makeover Week One: Goals and Before Pictures
Week Two: Clearing surfaces and selecting storage containers
Week Three: Craft Room Purge, Sort & Organize
Makeover Reveal with Before and After Photos
Supplies for making a Framed Peg Board
- Thrifted Picture Frame
- E6000 Glue (buy it here)
- Kitchen Sponge, like these on Amazon
- Peg board, home supply store
- Paint in desired color
- Pegboard hooks to hang things, (on Amazon here)
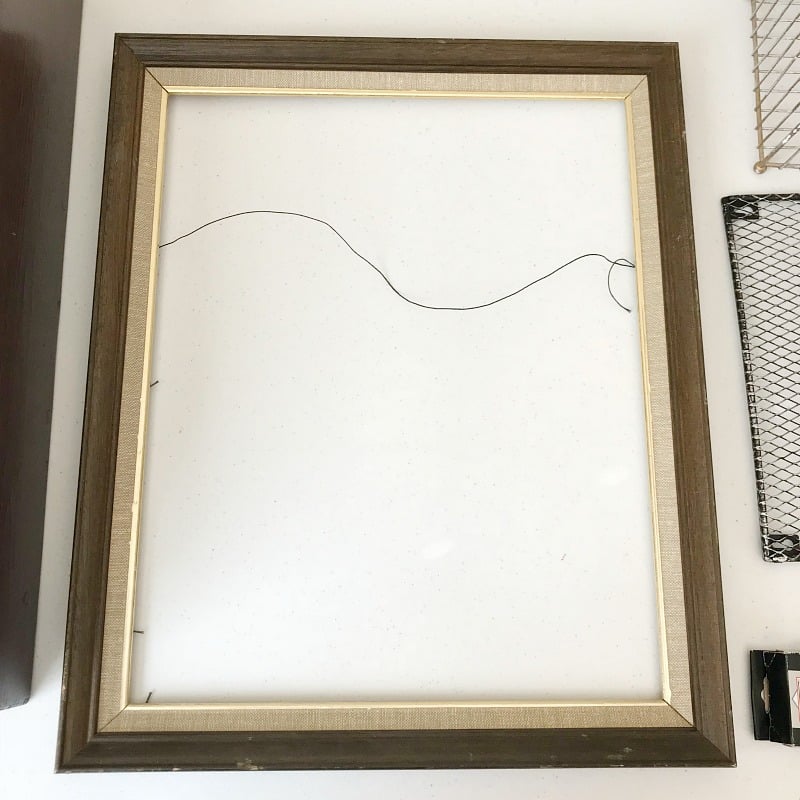
I spotted this frame in a thrift store and picked it up for only $1.50. It is a wood frame trimmed in a light paper which is glued on with a gold trim on the inner rim. It has good bones and is sturdy enough for a peg board and even has a nice wire attached on the back for hanging.

Painting the frame
I originally gave the frame a coat of the same paint color I used for my porch swing makeover, Pergola from the DecoArt Americana collection. Then I decided I preferred black so I spray painted over the Pergola.
Because I have two colors of paint on the frame, I could do a little light sanding to give it a distressed look for character if I want to.
Cutting the pegboard
My peg board came from Lowe’s. It comes in large sizes which you can then cut down to suit your purpose. My hubby measured the inside of our frame and cut the pegboard to fit.
He used a straight edge and ruler to mark the measurements onto the peg board then cut with an electric saw. Measure twice, cut once is the best rule of thumb.
Glue the pegboard to the frame
Notice the black arrows pointing towards the edges of the frame. This is where the E6000 glue goes.
Just squeeze a bead of glue along that edge and press the cut peg board onto it. Place a couple of heavy objects on top and allow ample drying time.

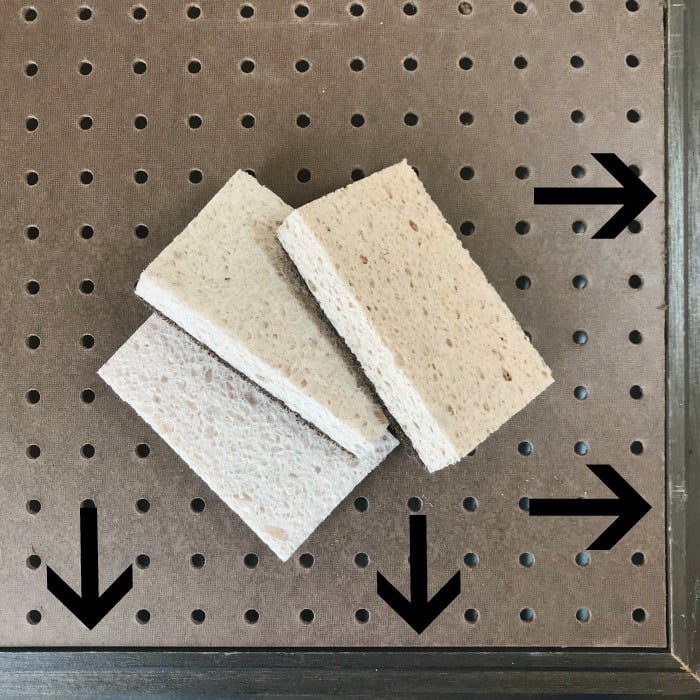
How To Keep A Framed Peg Board From Scratching The Wall
This is where the sponges come in.
Simply take one rectangular sponge and cut each corner triangular as shown. Use E6000 to attach the sponge pieces to each of the four corners of the frame. Allow ample drying time. Now your framed peg board won’t sit flush against the wall.
Also See:
Make yourself some basically free storage containers for lots of small craft supplies like glue sticks, pom poms, chalk and more. How To Repurpose Mayonnaise Jars Into Pretty Craft Storage Containers
One of my favorite organization tools in my craft room is this Two Tier Spinning Tray. I made it with thrifted pieces and a spinner thingy. It sits to the right of my work space and I use it all of the time.


More Homemaking Tips
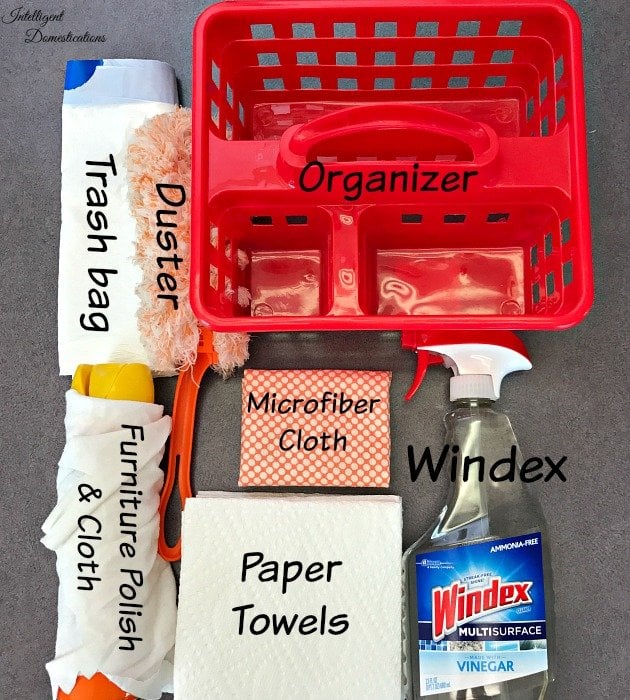
Set up your own speed cleaning kit and use our tips to speed clean your home

Can't figure out why your dish cloth is always dark and stinky, here's why and how to prevent it from happening.

Most Useful Packing and Moving Tips What Worked and What Didn't
My packing and moving tips from our big move after living in the same home for 17 years.

Put your vacuum cleaner attachments to work for you so you work smarter not harder to clean your home.
Make yourself a cheap and easy outdoor table with Dollar store supplies and a glue gun. Total cost of this cute table is $3.

Party games everyone enjoys for lots of laughter and fun.


Tips for Selling Your Home Fast

Don't toss that empty Popcorn tin. You can repurpose it into something useful.


It’s very helpful for crafting and DIY work.
“How To Keep A Framed Peg Board From Scratching The Wall” I was looking for this part but also I got more tips. Thank you…
What a great idea. I need to make this. Thanks for sharing.
You’ve got me thinking I need a pegboard organizer for my craft space!
Hi! Shirley. I really enjoyed this tutorial. I was wondering if you could tell me about how much time did you invest in making this project? I am looking for something that can be done in 2 hours or less.
Nigel you could easily have this completed in under two hours if not for the drying time of both the paint and glue.
Clever solution with the sponges! I’ve been seeing a lot of hooks in frames lately. Thanks for sharing with us at Creatively Crafty #ccng 🙂
I love pegboard for organizing. This is just perfect with the frame and it holds all of the important tools. Picture frames from the thrift store are very abundant but sometimes it is hard to find a nice one. You did a great job.
I wanted to let you know I am featuring this great project at #merrymonday this week. I hope you will check it out when you have a chance! https://ourcraftymom.com/15-upcycled-cool-creative-home-decor-projects/
I love everything about this idea! I have a thrifted large poster board size frame that this would be perfect for. So clever! I’ve got tons of paint brushes and other things that I need access too that could just hang right where I want them. Pinned because I’m definitely making one of these now 🙂
Not only is the pegboard handy and helps with organization but it is so stylish too.
This is a neat (no pun intended) idea for organizing your craft room! Never thought to use a picture frame to house a pegboard. So many design possibilities! And adding sponges to the back is a very creative idea that can be used in so many types of wall hangings!
Great project and it’s perfect since you’re working on your craft space this month.
That’s a neat pegboard! Useful and functional always gets my attention! I appreciate the step-by-step tutorial too b/c I’ve never done one of these before. The sponges are a clever idea too.
I love how your pegboard turned out. It’s so clean and everything has a place. Great upcycle!!!
What a great idea! I have smaller squares of pegboard already cut, butnit never occurred to me to try and find frames for them. The soonge trick is genius, too.
Your sponge idea is so great! I have peg board in my garage and have been wanting to do something like this! I may just have to now.
I love this peg board storage, it’s perfect for craft supplies. Great idea to put sponges on the back. Looking forward to the craft room makeovers.
This looks great, Shirley and I love the tips about using the sponges. I would never have thought of that!
I’ve been planning some peg board for my office/craft room makeover but knowing the hubby would think it’s for the garage I’m sure I can sell him on it if it’s inside a pretty frame. I love that you also included a box and some jars in yours. And how smart to clip your glue and hang it too. I’ve been trying to figure out how to best store them (winner!)
This is so stinkin’ smart! I need like 10 of these for my craft room. Thanks so much for the awesome tutorial, Shirley!
Love peg boards! They have so many uses. I have a creatively messy 8 year old whose room could probably use one! Visiting from Thrift Store Challenge.