DIY Spinning Two Tier Tray
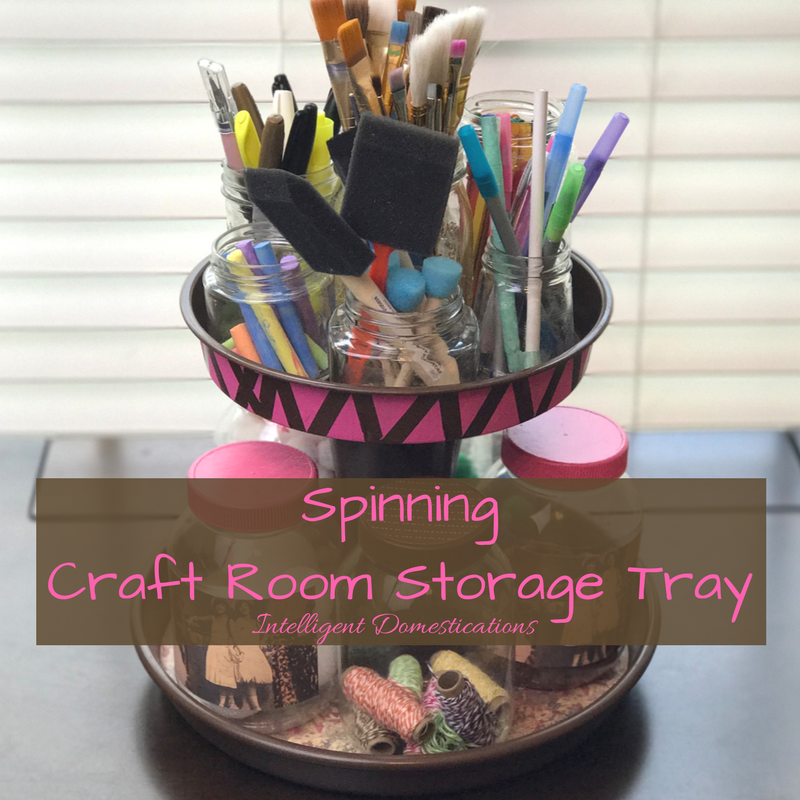
Craft room storage is always a problem, isn’t it! Following the philosophy of if you can’t go out, go up with space, I created this spinning two tier tray for storage!
You can easily make your own Spinning Two Tier Tray with my step by step instructions. It’s pretty much paint, glue and imagination.
Be on the lookout for a couple of handy trays at the thrift store and follow my easy instructions to make a two tier spinning tray for your craft space too.
This article contains affiliate links.
How To Make A Spinning Two Tier Tray
This is one of those projects which began months ago then transitioned. You have a few of those, right? I knew from the beginning that I wanted it for craft room storage but I saw how cool it would be for Christmas season decor too.
Who doesn’t love a good two tier stand? They are so useful around the house and fun pieces of functional decor. Making it spin just made this one even better! Do you remember when I made this Two Tier Pin Cushion or upcycled picture frames into this pretty Two Tier Tray?
Supplies
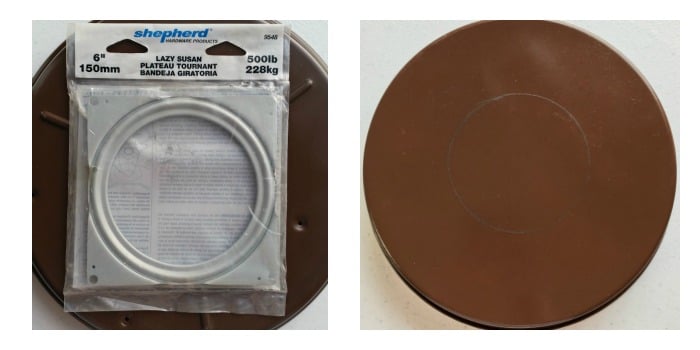
- Pizza pan for the bottom
- Cake pan for the top
- Thick round candle holder
- Lazy Susan 6″, here on Amazon
- Acrylic Craft Paint (Pink)
- Krylon Maxx Leather Brown gloss spray paint
- E6000 glue
- Mod Podge
- DecoArt Tutti Fruitti acrylic paint
- 1 piece of pretty craft paper (I used a toile design)
- Washi tape
The other components of this project include an old Domino’s pizza pan which I was almost giddy for finding! I paid close to $4 for it at a thrift store which is a high price coming from my pocket! The cashier asked me what I was going to do with it and agreed it was the perfect piece when I told her.
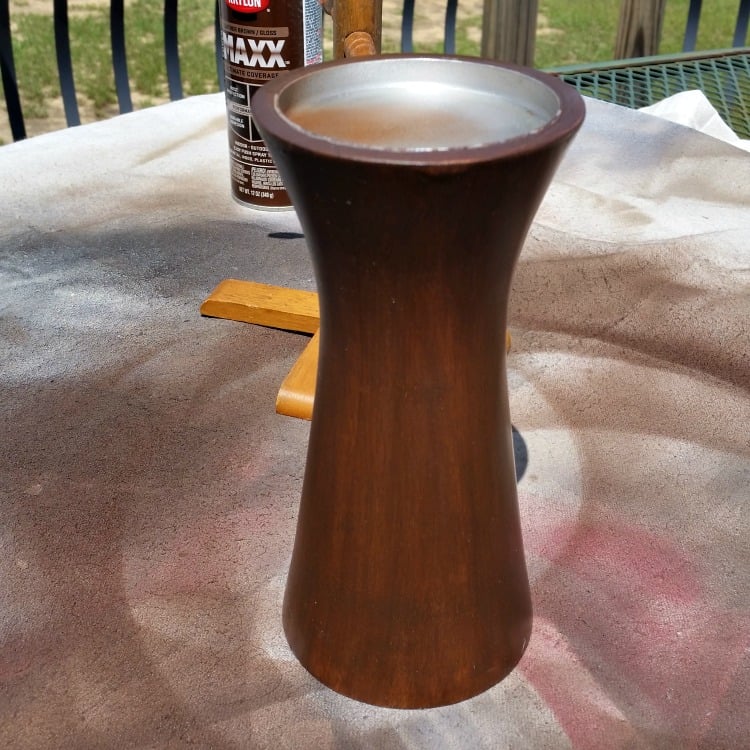
Don’t you just love how thick this wooden candle holder is! I knew it would be perfect for this project when I spied it in the thrift store that day. It is solid and the heaviest part of this project.
Step 1
The first thing I did was to spray paint the candle holder and pans with brown paint. I chose brown because I love the look of pink and brown together which is what I’m splashing about in my craft space.
I went ahead and painted both of the pans to match the candle holder. You will see in a minute how I added the pink accent stripes.

Step 2
Next I measured and cut a pretty piece of craft paper to decorate the inside of the bottom tier. I used Mod Podge to glue it into place and then gave it a top coat of Mod Podge as a sealer.
Step 3
After applying a generous amount of E6000 glue between the candle holder and the cake pan, I weighed it down with heavy vintage cookbooks. See, a cookbook collection does come in handy!
I repeated the process to attach the candle holder to the pizza pan and allowed ample drying time.

If you have seen any of my projects before, you know I am a fan of pretty craft paper. When I bought this pretty toile print, I didn’t even have a project in mind! I found it at Hobby Lobby.
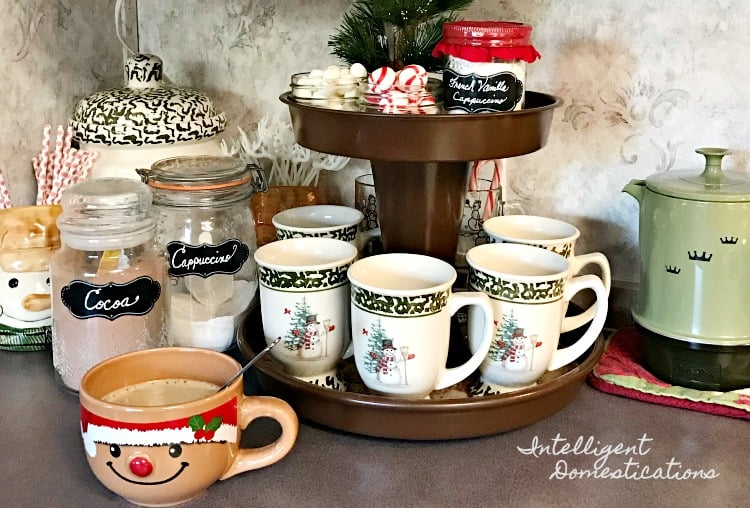
Dual Purpose
So I loved the look for the brown two tier spinning tray. The depth on the top achieved by using a cake pan and the lip on the bottom from the pizza pan were nice touches. I had to use it for a cocoa bar before it’s finally resting place in my craft room.
Adulting means doing a whole lot of waiting. Adults wait on everything and this project is living proof from me. I did indeed wait until after Christmas to add the pink and relocate this tray into the craft room.
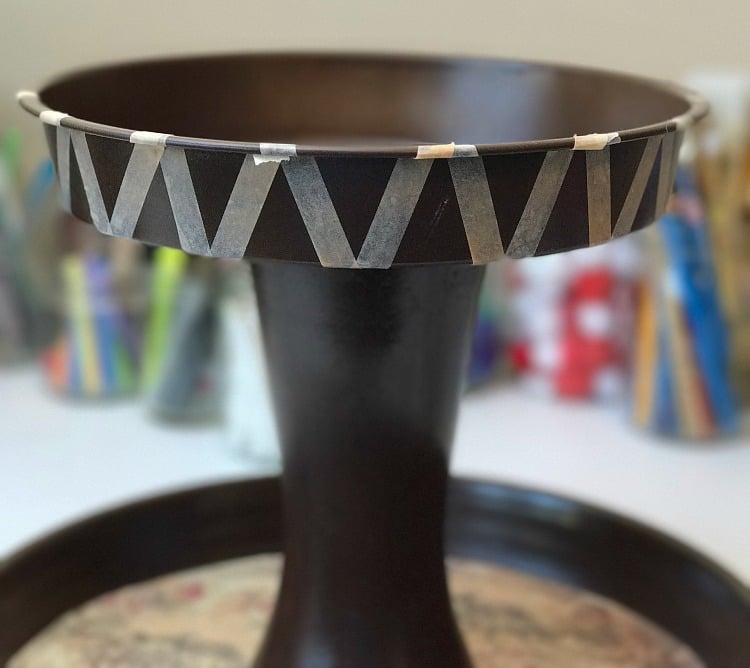
Step 4
I used narrow Washi tape to create the ‘V’ pattern on the cake pan. After adding all of the tape I painted the area with my pink paint and let it dry. Removed the tape and there ya have it, a pretty pink and brown accent. Not too much, just enough.
Three coats of DecoArt Tutti Fruitti acrylic paint later and this project is complete.
Finished Spinning Two Tier Tray
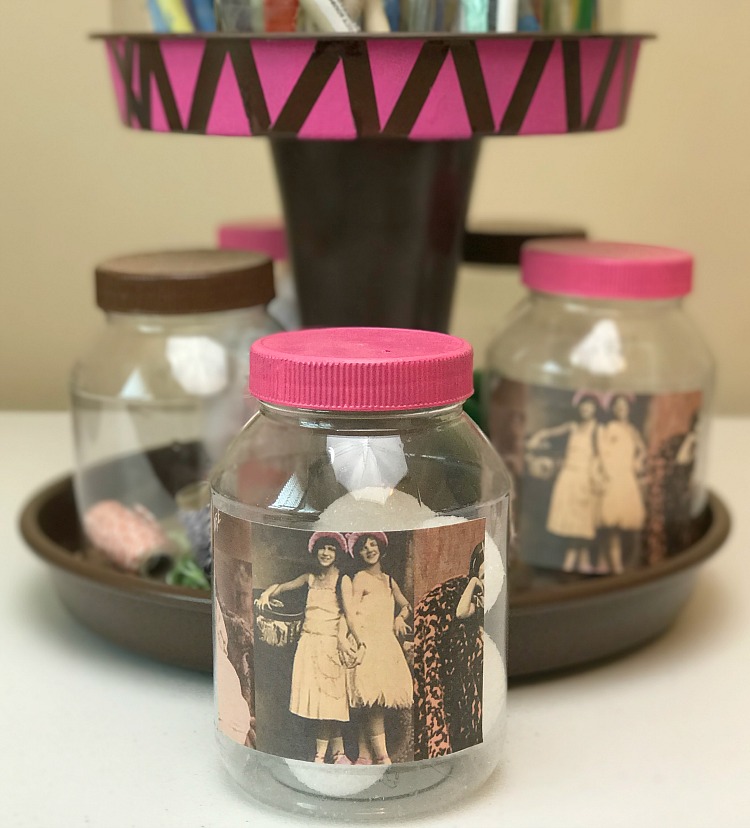
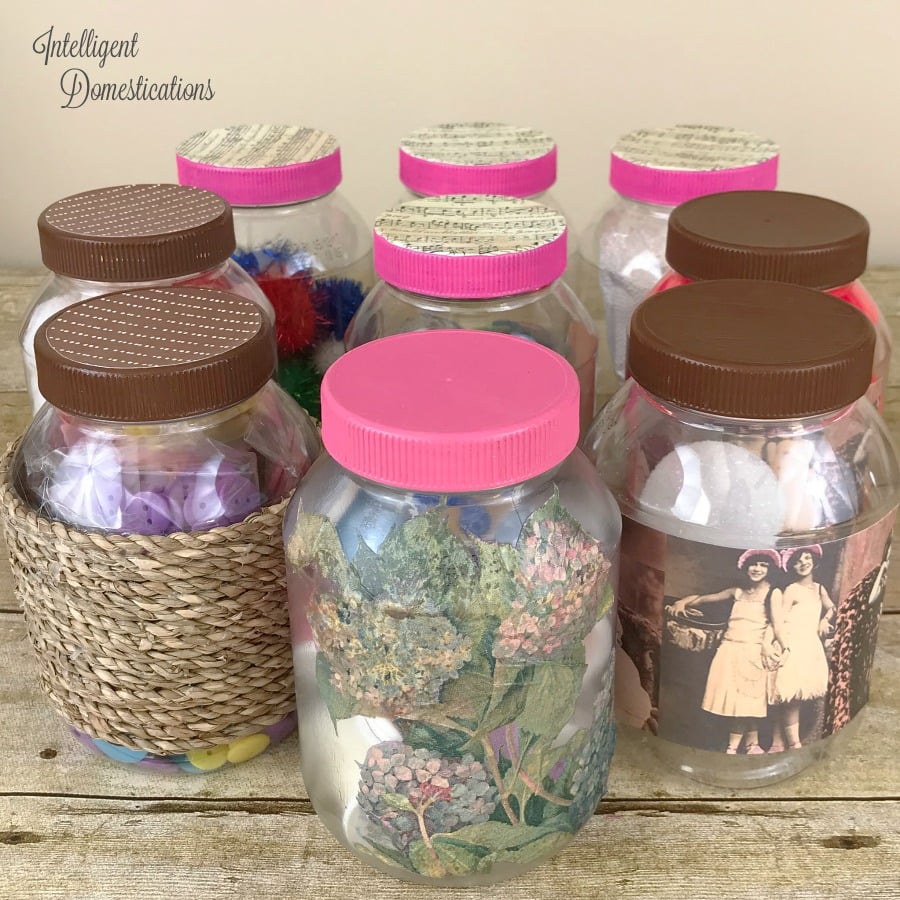
You might recall my repurposed mayonnaise jars. They are perfect for craft room storage. I have been painting the lids brown and pink to match my craft room colors. Using Mod Podge and pretty paper, I added a little character to the fronts of some.

This DIY Two Tier Tray was a simple and easy project anyone can do with minimal craft skills. It’s mostly just paint and glue and a little imagination. This spinning storage tray solved a craft supplies storage problem for me. It sits to my right on my craft table and is without a doubt one of the most used tools in my craft room.


More Easy DIY Projects You Can Do
How To Make A Two Tier Tray Using Thrifted Picture Frames
DIY Outdoor Solar Light Floor Lamp
21 Crazy Easy Beginner Cricut Projects for You To Try
Cheap And Easy Cardboard Box Snowman Bean Bag Toss Game
Make Your Own Mason Jar Ring Pumpkin Using Washi Tape


I love craft storage and this lazy susan idea is great and I adore your vintage style jars
What a neat idea!
I would love for you to share this with my Facebook Group for recipes, crafts, tips, and tricks: https://www.facebook.com/groups/pluckyrecipescraftstips/
Thanks for joining Cooking and Crafting with J & J!
I’ve been struggling to figure out how to organize my craft supplies. I hate putting them in containers or drawers because I always need to pull them out. This idea would work perfect!
This is adorable. What a great idea. I love how it turned out!!
I love spinning storage trays. Every time I find a lazy susan at a thrift store I buy it. We have more than we need at the moment but they eventually get used for organizing. I have yet to spray any of them as pretty as yours. The hot cocoa bar is too cute but the addition of the pink really made a big difference. I love it!
I love this Shirley! I have two lazy susans in my stash! Great idea to put them under something. Thanks for the inspiration. Love the pizza pan too!
Kim
Great idea for crafty storage, my stash could really use some organization. 🙂
I love the idea of the lazy susan. It makes it so functional. Plus how can you not love the toile paper and the fancy jars you made. It is a great upcycle with loads of uses.
Love the idea that it spins so you can see everything! Thanks for sharing at The Blogger’s Pit Stop! Roseann from http://www.thisautoimmunelife.com
I need one of these for my desk. I just have stuff overflowing everywhere and this would definitely help contain some of it!
I’ve always wanted a lazy susan in my pantry and didn’t realize that I could DIY with a lazy susan plateau. I know what I’ll be picking up the next time I stop into Lowes…lol.
I cannot wait to see what you make! Lowes is exactly where mine came from and I just glued it on with E6000.
Shirley,
This is a great idea! Thanks for sharing!! Thanks too for taking the time to stop by and leave such a sweet comment!!
Hugs,
Deb
I had no idea they sold lazy susan plateaus!! I have a large wood slice that I would love to turn it into a lazy susan. Thanks for the inspiration!
I can’t wait to see what you make Michelle! You are so creative.
Wow, this looks awesome! It is so creative and craft storage is always a must. I recently organized ours in bins and baskets but I love this tier idea. It is such a pretty and creative idea. I’m also loving how you re-purpose the mayonnaise jars and paint the covers to match your craft room.
Thank you Zan. Those repurposed mayo jars are one of my fav things in the craft room. The grands love crafting at my house and seeing all the baubles and supplies in those jars. They enjoy making crafts and I enjoy them making memories.
This is so great for craft storage! 🙂
Oh wow! This is so cool! Great idea for a craft storage space!
What a great project Shirley. It looks like it came that way. I will now have to be on the lookout for a pizza pan so I can make one for my office/craft area.
I’m always looking for storage solutions for my ever growing craft supplies. I love how you repurposed the mayo jars and the vintage look you achieved with the pretty paper and the characters. What a great upcycle idea!