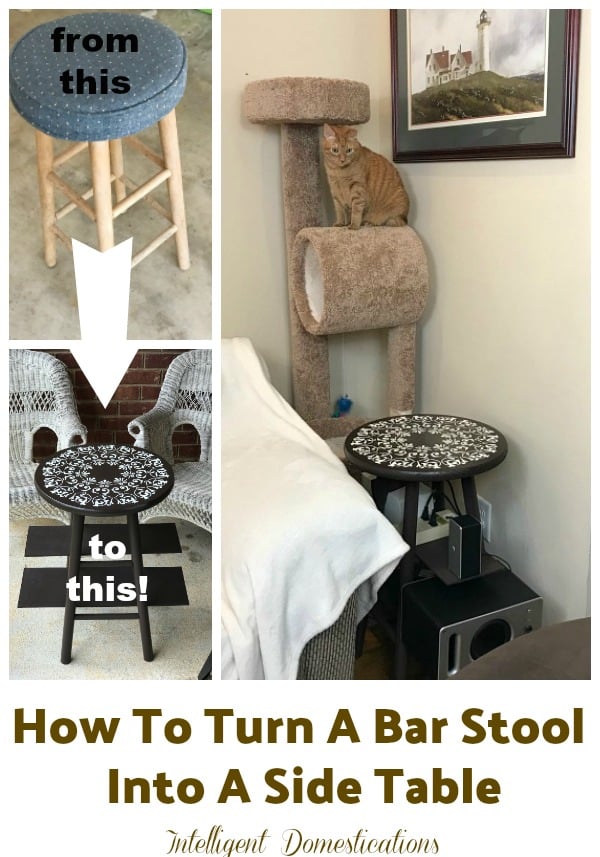
How To Turn A Stool Into A Side Table
We had a problem corner in our living room which we solved by repurposing an Old Wooden Stool Into A Side Table! It is an easy DIY project requiring little skill.

The above photo shows our new end table outside on the back porch because the shellac was drying and I thought it looked lovely by those old wicker chairs. I couldn’t resist snapping a photo to send to my hubby. I am not the only one who loves those Mandala stencils!
Before Picture

You have seen these old wooden bar stools at yard sales, and thrift stores or you may even have one yourself. This one is a yard sale find for $1. There was never a time when it was going to be used for anything other than a side table.
We love to paint furniture for an easy makeover. See this USA Flag Porch Table we painted!
Here’s The Problem

We had this problem corner in our living room. This is where I sit most evenings and watch TV with my hubby, usually while working on the laptop. My hubby sits in his recliner just in front of the table. This is sort of our corner in the living room.
There were multiple things wrong with this corner and the end table in particular from my perspective.
- Too many cords are visible
- The end table sits too low for functional use next to the sofa
- We do not even use the lamp and don’t need it to be there.
- The large space on top of the table lends itself to collecting ‘stuff’
- The power strip is too hard to reach and wound up on top of the table for plugging in a device
Solution
My solution was to turn the bar stool into a side table mostly because it would be higher so I could easily reach to sit a drink down. I am precisely 5 foot zero with those little short arms so reaching down to the old table was a stretch for me. Most of the time there is a cat sitting on the sofa arm next to me so he is usually preventing me from reaching the table also.
Supplies
- 1 Used Wood Bar Stool
- 18″ Round pre-cut tabletop (aka Radius Edge Euro Spruce board from Lowe’s)
- 1/4″ Maple plywood
- Gorilla Glue, like this
- Paint
- Shellac Spray, like this
- Spray sealer, like this
- Mandala Stencil, similar to this one
Tools
- Hand saw
Repurposing a bar stool into a side table is actually a fairly easy wood project requiring little skills.
Step 1
First, I removed the cushion and washed the legs. Thrift store finds always require a good cleaning.

Step 2
Then I sprayed the edge of the seat which is particle board with a sealer to keep it from peeling and chipping off. I also sprayed that edge with paint for double security to keep that particle board from chipping off.
Step 3 Adjust the height
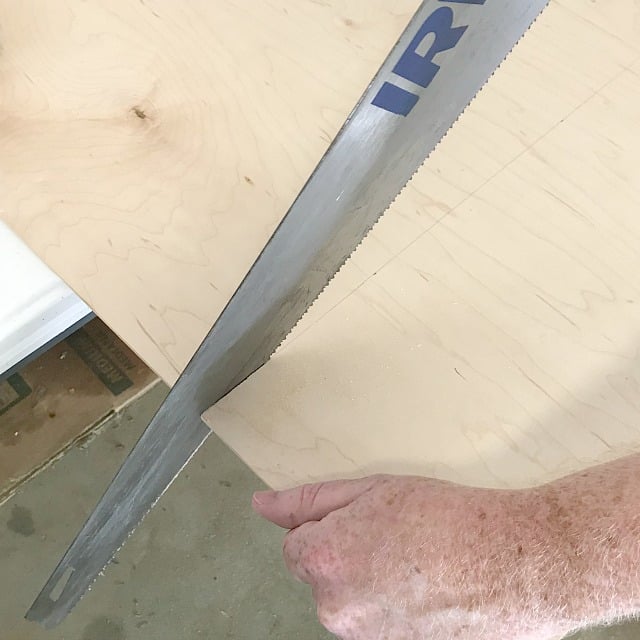
All four legs were cut to make the table the correct height to be functional next to our sofa. He cut about 1 1/2″ off each leg. To get that information, he measured the distance from the floor to the arm of the sofa. Then he measured each leg and cut-off the correct amount.
Although my hubby does have power tools, he opted to cut the boards and the legs using a hand saw. If you do not have power tools, you can still do this project with a simple hand saw.
Step 4 Making the shelves
Then he measured the inside area of the top and bottom rungs and cut the shelves to fit from the maple plywood. We purposefully staggered the top shelf to be slightly smaller than the bottom. This is because of how we intend to use it in our living room.
The bottom shelf is going to hold the surround sound speaker. The power strip will be tucked inside of the top shelf to get it out of the way and also allow easy access. The second small speaker will also be on the top shelf.

Step 5
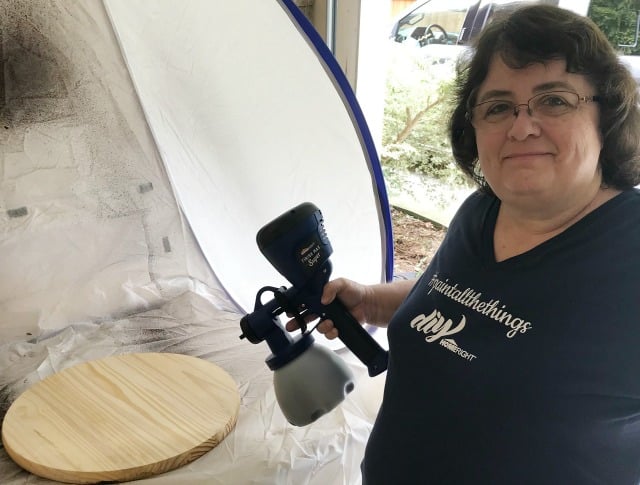
Thanks to HomeRight, we used our new Finish Max Paint Sprayer which made short work of the painting process.
I always spray painting something in my garage. My hubby feels the need to caution me not to get spray paint on the car constantly. I have never done that but I won’t tell you the colors on the wall.
He has no more worries now because my new HomeRight Medium Spray Shelter keeps all over the over-spray containerized! Yes, it was fun! I love my new toys I mean tools! My hubby is in love with both the paint sprayer and the portable paint shelter!
Step 6 Putting It All Together
Step 7 Stencil the tabletop
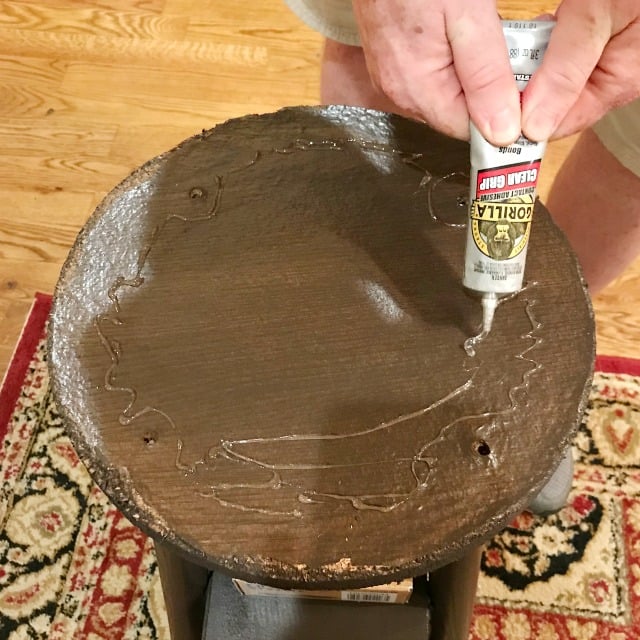
Once all of the pieces were painted, it was time to put them all together with the help of Gorilla Glue. We wanted the tabletop to be one smooth surface without screws which is why we chose to use glue.
Simply spread an ample amount of Gorilla Glue onto the top of the bar stool, place the new round top in place, and set something heavy on top.
We repeated the process for both shelves. Gorilla Glue dries quickly but we still let it sit overnight before adding the Mandala stencil work.
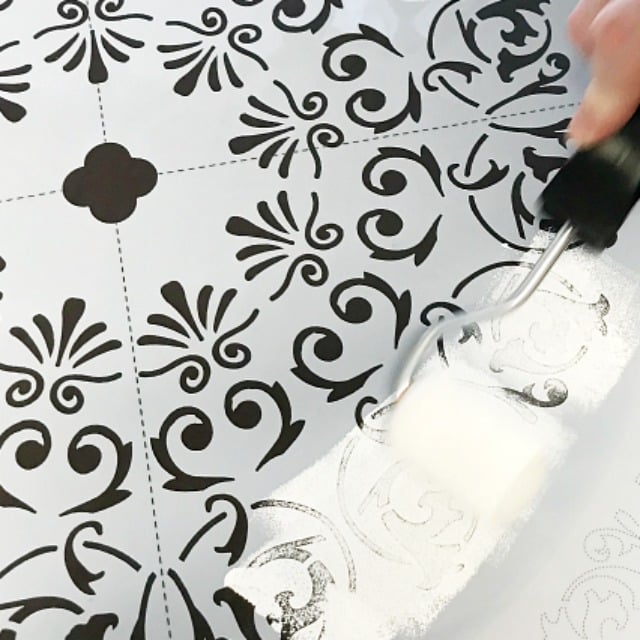
I found the right-size Mandala stencil at a craft store. It was not on sale so I was able to use a 50% off coupon so Yay!
Step 8 Shellac
After the paint from the stencil was dry I sprayed two coats of Shellac on top only to create a nice finish and protect the surface.

Our corner got a nice little makeover and we solved all of those problems.
The big speaker fits perfectly on the bottom shelf with the small speaker above it. You can see the power strip on the top shelf. It is now easily accessible for plugging in devices which happens often. It is also tucked out of the way.
The lamp is gone so that is one less cord and all of the rest of the cords for the power strip and speakers are tucked beside the table. There is room on the top shelf in the back for a tissue box, ever present in my living room.
I can easily reach the table top to sit a drink down now so that makes me happy.
The cat tree was relocated to the new empty space behind the smaller table so they can sit there instead of on the arms of the furniture. They are determined to be right next to us so we decided to accommodate them.
Also See: 9 Reasons Cats Stop Using Their Litter Box
If you have a sofa or chair with high arms, you may find that making your own side table will be the solution too. If you do decide to embark upon a DIY project requiring paint, be sure to gift yourself with the Finish Max Paint Sprayer. It is my hubby’s new favorite thing. The HomeRight Medium Spray Shelter is my new favorite thing because I almost always have a spray paint project going on!


This is so cute. And it is very versatile. It is inspiring me to do something with the mandala stencil I bought so long ago.