Poinsettia Christmas Wreath Tutorial
How To Make A Poinsettia Christmas Wreath Using Floral Picks
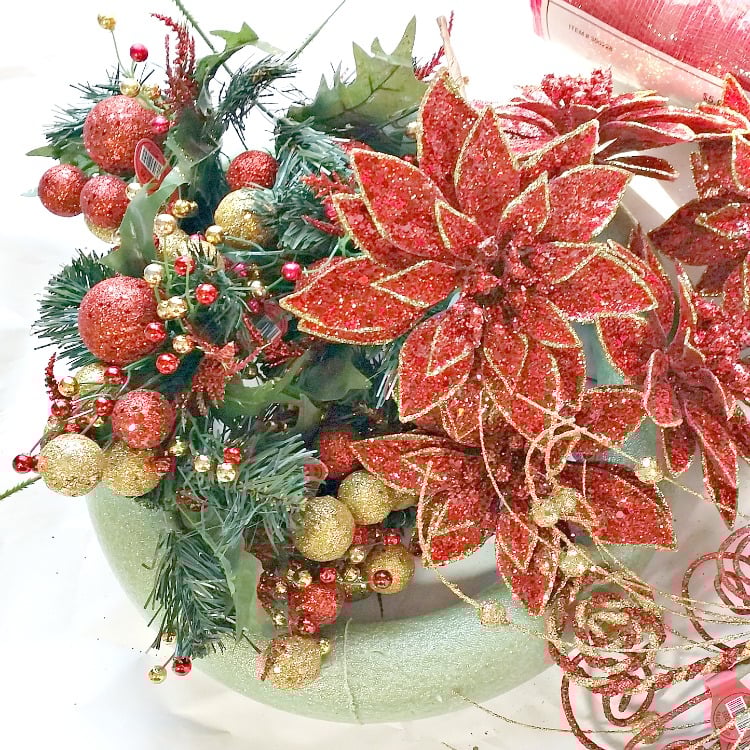
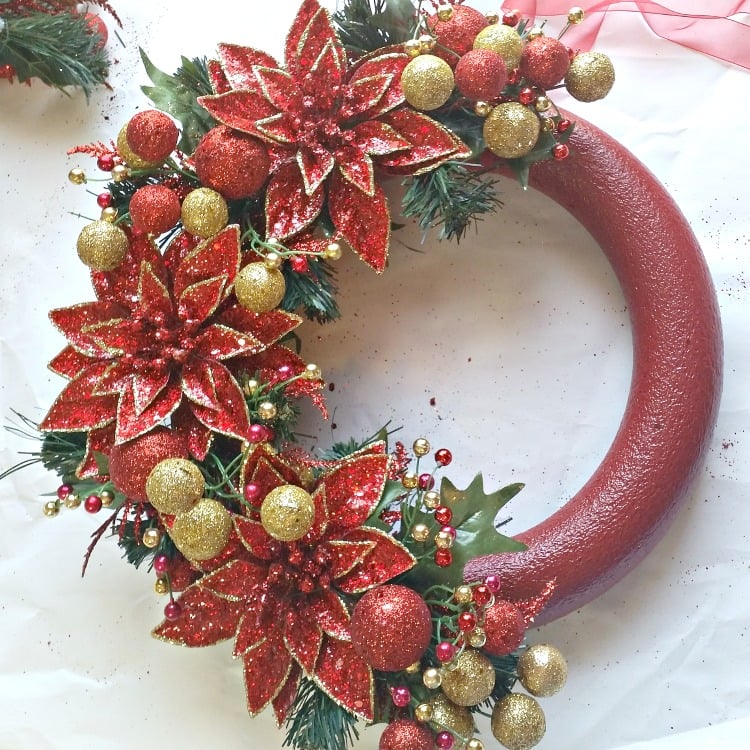
There are oh so many ways to make a wreath. Only one of these is using floral picks like this DIY Poinsettia Christmas wreath I made.

I love this Poinsettia Christmas wreath because the colors are vibrant red and gold. Plus the poinsettia picks are glittery for that bling Christmas feeling.
I used to make wreaths every season, long before I ever became a blogger. Many years ago I took a silk floral design class and made lots and lots of arrangements for family members as well as my own home.
This article contains affiliate links. Please see our Disclosure Policy.
I became the designated person to create cemetery arrangements in our family. You know those can be so expensive. As a matter of fact, store-bought wreaths and flower arrangements can be very expensive which is why learning to make your own is a good frugal living trick.
Supplies
There are only a few supplies needed to make our Poinsettia Christmas Wreath.
- 5 Poinsettia picks (I found these at Hobby Lobby)
- 5 Gold and Red Ball picks (Hobby Lobby)
- Ribbon for hanging
- 12-inch Wreath Form (Dollar Tree)
- Spray paint
- Hot Glue Stick
- Hot Glue Gun
Step 1 Paint
Begin by spray painting the wreath form red and allow it to completely dry. I wanted my wreath form painted because with this particular wreath design, the form will show in places and I didn’t want it to be green.
While the paint is drying, prepare your work surface. These disposable kitchen counter covers are great for working in the craft room too.
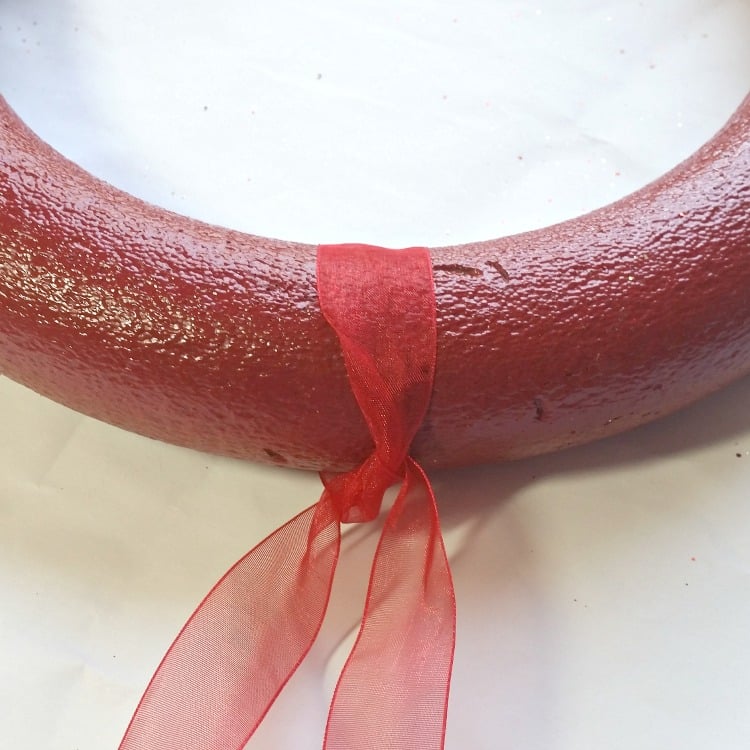
Step 2 Add the hanger
Glue the Ribbon for hanging onto the wreath before adding the picks. Make this the top of your wreath which will help to determine the placement of the picks.
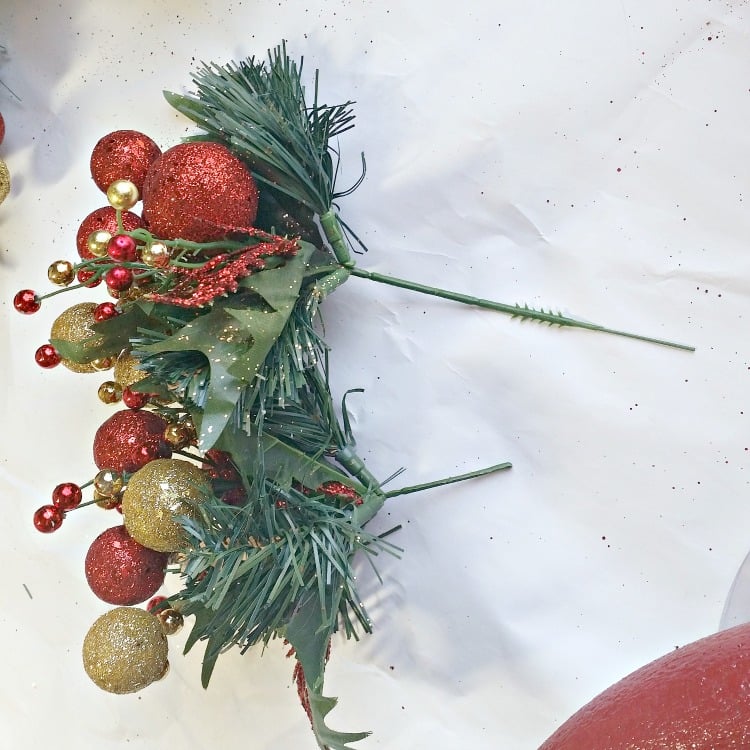
Step 3
Measure and cut the stems to fit your wreath form so they don’t poke out the other side after being inserted into the wreath form. This is really a trial-and-error process with the first pick.
Step 4 Lay out your design
Before you begin adding your picks, place them around the wreath form to get a general idea of how you want them to look.
I did this step in the store which helped me determine how many picks to purchase. I placed a wreath form in my shopping cart and then placed the picks all around it to get an idea of how many I might need.
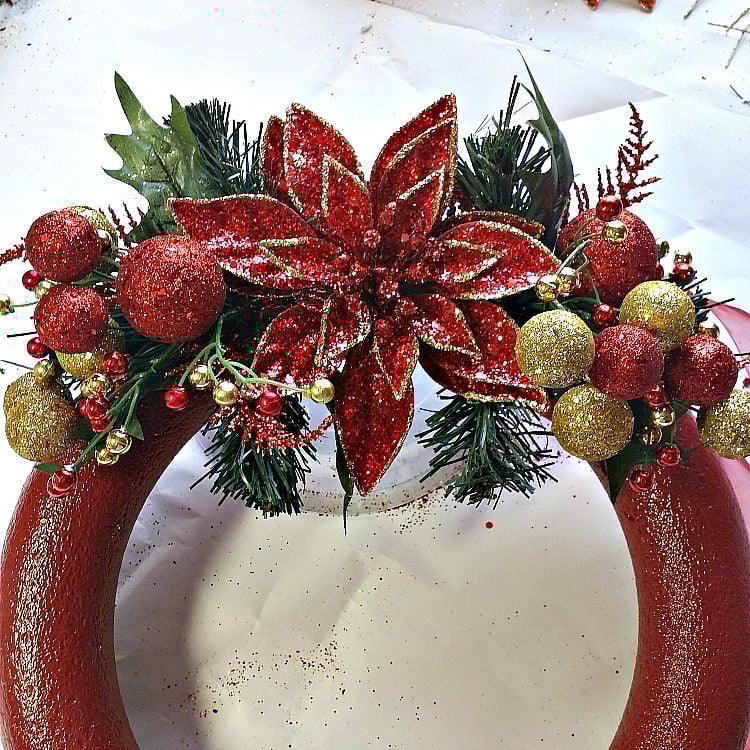
Step 5 Add the poinsettia
Begin adding the picks but do not hot glue them at this time.
Continue adding picks all the way around the wreath. I added the hot glue after I was satisfied with the placement of the picks. Just one small dab of glue is sufficient where each pick is inserted into the form.
Don’t be afraid to bend and shape floral picks. As long as you have a hot glue gun, you can fix anything that breaks.
Timing Tip
You can easily have the wreath completed in under 30 minutes if you paint your wreath form the day before so it will be dry.
I found these gorgeous blingy poinsettia picks at one of my favorite craft stores, Hobby Lobby. The total cost of supplies used was about $25.

With proper care, you can continue to display your beautiful seasonal wreaths year after year. Do not store them in an outdoor building like a storage shed where they will be susceptible to rodents and the heat of the summer.
Ways to store wreaths
One way I have stored wreaths is to hang them on a high wall inside of a closet. I cover the wreath with a plastic bag to protect it from dust.
Another way to store wreaths is on a hanger in a closet on the closet rod, like this.
If you have attic space in your home, you can add a few nails to the high beams in the attic. Hang the wreath on the nails. Always cover your stored wreaths with a plastic bag to protect them from dust.
More DIY Wreath Ideas
- DIY Valentine’s Rag Wreath
- Monogrammed Spring Watering Can Wreath
- DIY Yellow & Purple Floral Summer Wreath
- Make A Red White and Blue Bandana Wreath
- How To DIY A Witch Hat Wreath
- DIY Fall Wreath with Mums and Pumpkins
- Make Your Own Mini Wreaths for Kitchen Cabinets for Christmas


This is SO pretty!
I would love for you to share this with my Facebook Group for recipes, crafts, tips, and tricks: https://www.facebook.com/groups/pluckyrecipescraftstips/
Thanks for joining Cooking and Crafting with J & J!
Your poinsettia wreath is lovely, Shirley. Thanks for sharing your tutorial with us at Snickerdoodle. Pinning to my Christmas Board.
What a beautiful wreath. My mother would love this.
Wow!! These are such a great idea!! I am definitely going to have to try and make some of these, they are so beautiful!!
Love all these wonderful craft ideas
That is so festive looking. Just in time to make one.
The wreath is outstanding! I love it! It looks classic and elegant!
I like this wreath idea. I would make it for a friend because im not a big poinsettia fan
This is a great idea.
Pointsettias are just lovely. This wreath idea is refreshing instead of strictly greenery. I’ve also seen people use pool noodles if they don’t have a wreath form!
Beautiful. Thanks.
What a gorgeous wreath. I can only imagine how expensive this would be if you bought it in a store.
Wow!! Love it!! It is so beautiful and rich!!
Using the middle ring makes wreath-making look easy. I had no idea!
My husband buys me a Poinettia every year. I love the idea of a wreath.
This is absolutely stunning! 🙂 Would love to be able to do something like this for myself! 🙂
My parent’s new kitten (well, she’s a cat now!) destroyed their wreath last year. I was planning on making her one and this is by the far the prettiest tutorial I’ve seen! It’s absolutely stunning and looks totally do-able! Can’t wait to hit up the craft store! 🙂
You did a fantastic job! It turned out really pretty! 🙂
thanks for the opportunity
Nothing screams Christmas more so than poinsettias! I love this wreath!