DIY Orbs Using A Plastic Baseball
Learning to DIY Orbs is a frugal way to keep changing your decor seasonally. A tray or bowl can be styled using Orbs for every season. If you have ever gone shopping for Orbs in a particular color or texture, you know they can get expensive.
I have recently fallen head over heels in love with the blue and white decor! Because I saw the prices of those lovely porcelain blue and white orbs, I knew I had to come up with my own DIY Orbs! Mod Podge and the Dollar store to the rescue!

My crafting skills have improved over the years as a homemaker. I am very much at home in my craft room. I have created what I consider to be a comfortable craft space where I enjoy making things for my own home as well as gifts for others. Mod Podge is my favorite medium to use.
Supplies
Here’s all you need, just three things!
- Pkg. of pretty blue and white paper napkins
- Mod Podge
- Plastic Wiffle Balls from the Dollar store
Tools Used
- Scissors
- Paintbrush used to spread Mod Podge
- *Small, recycled plastic cups to rest each ball on
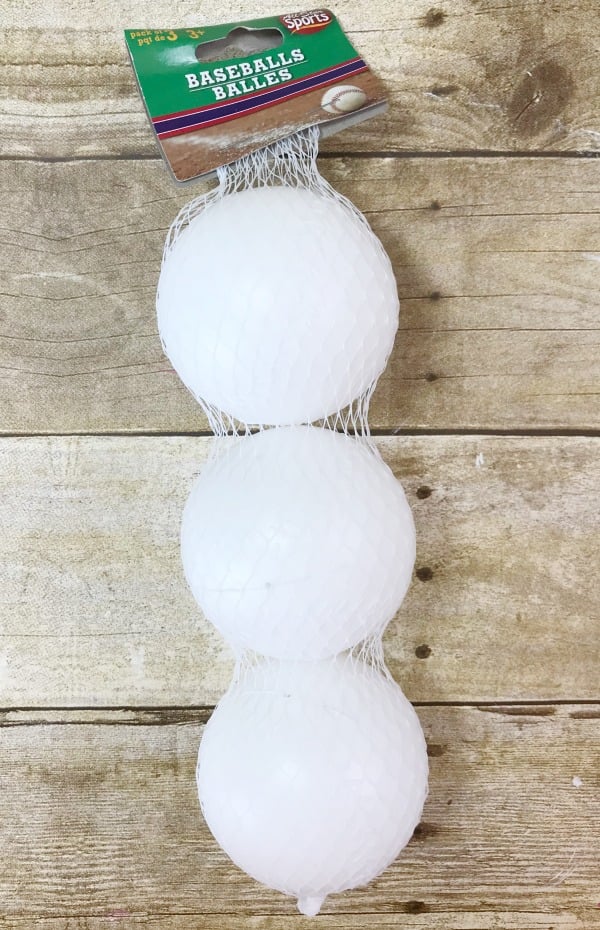
Yes, I am smiling because these plastic balls come three to a pack for $1.25. According to my limited math skills, that makes them about .41¢ each! Cha Ching! Huge savings on home decor! We call them Wiffle Balls, and they can yield tons of fun with a Wiffle Bat! I’ll never tell the children I defiled a Wiffle Ball by making it into home decor!

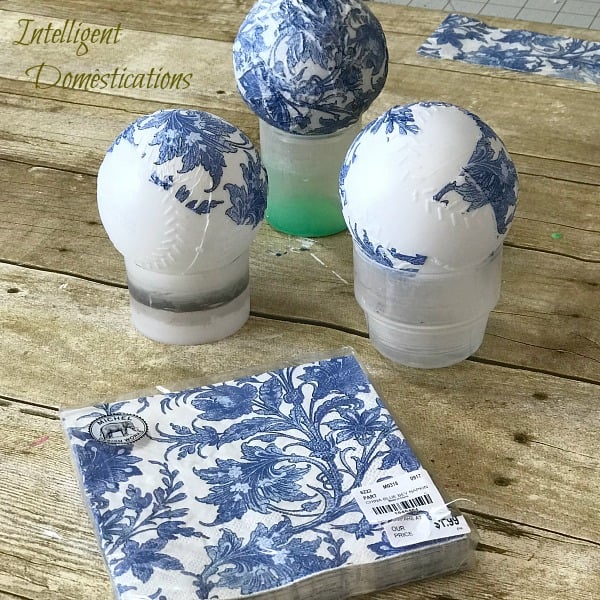
My napkins came from Tuesday Morning, where you can always find a nice variety of beautiful napkins. The brand is Michel, which is also available in some really pretty colors and patterns on Amazon here. I love this chinoiserie!
It is important to separate the layers and use only the pretty part anytime you decoupage with napkins. These were in three layers. I saved the bottom two layers for normal napkin use.
Step 1
Pull the napkin layers apart gently because they are very thin. You only want to use the pretty layer of a napkin when doing decoupage.
Step 2
Now, cut the part of the napkin you are going to use into several small sections. You will want to hold it near the ball and visualize how you will place the pieces. Match your patterns as much as possible before cutting. Lay your cut pieces aside until you are ready to begin the glue process.

Step 3
Paint a small section of Mod Podge onto the first ball. Then carefully place the cut napkin piece onto the glue and smooth it down so there are no bubbles. Working with a round surface using a pattern can be challenging. I simply do my best to match patterns as I work my way around the ball. In order to match patterns, you have to use multiple napkins when cutting the matching sections of the pattern.
Continue this process until all of your new, pretty DIY Orbs are complete. This quick and easy DIY home decor only takes a few minutes to complete. Mod Podge dries quickly.
Final Step
Once you have finished applying the napkins to your new Orbs, give them all a top coat of Mod Podge as a sealer. You will need to do a top section, set the ball in your small cup holder to dry, then once dry, do the bottom section. Mod Podge dries quickly, in a matter of minutes.
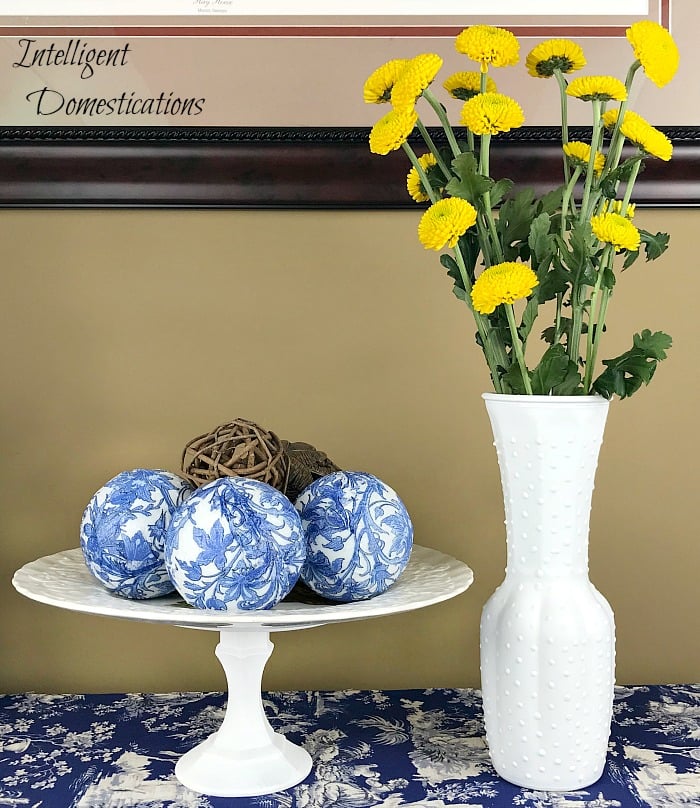
My new Blue and White Orbs used maybe six napkins to create three Orbs. I need more Wiffle balls, but the dollar store was out when I went back. Not to worry, you can order online and pick it up in store! Don’t you just love that option!
I worked with all three at one time by allowing the glue to dry on one ball before adding the next section.
Craft Room Hack
*One of my Craft Room hacks is repurposing plastic containers from household products. My orbs are resting in the laundry cups that come with liquid detergent. They worked like a charm for holding the balls as the top half dried.
More Blue and White Home Decor Ideas
- DIY Blue and White Moss Ball Topiary
- How To Make Blue & White Easter Eggs
- Make Your Own Blue & White Pumpkin Candy Dish
- Blue and White Christmas Tree Decorations
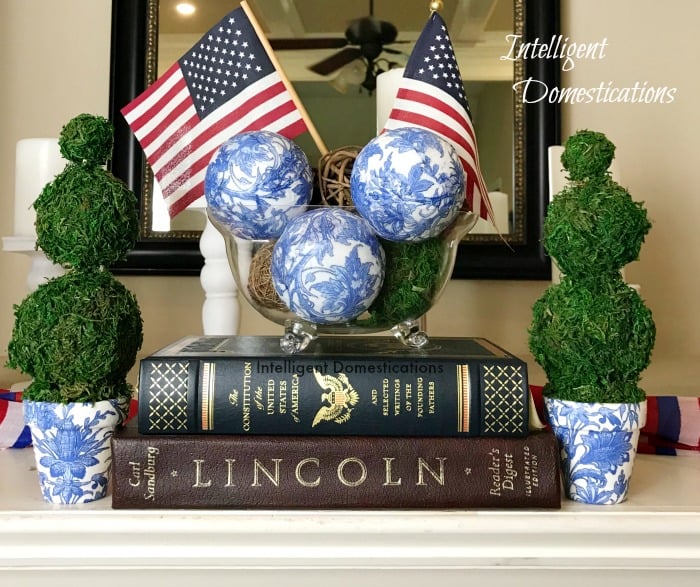
I used my new DIY Blue and White Orbs to style a bowl on my summer Patriotic Mantle. They will likely find their way into other rooms eventually. I plan to use those extremely affordable Wiffle Balls to make Orbs for every season! There is always a project waiting in the queue in my Craft Room!
More DIY Home Decor Projects
- Painted Pine Cones Spring Decor
- Decoupage Pumpkin Fall Vignette
- Red Plaid Embroidery Hoop Christmas Ornament
- DIY Painted Geometric Pineapple @Made In A Day
More Summer Decor Ideas
- Grandma Summer Camp Ideas
- Most Useful Packing and Moving Tips, What Worked & What Didn’t
- DIY Yellow & Purple Floral Wreath with a Watering Can
- 7 Practical Summer Project Ideas for Your Home
- How To Make A No Sew Patriotic Ribbon Flag


This is a great idea! I had actually used whiffle balls (with the holes in them) to make “kissing balls” with silk flowers for my DIY wedding decor, years ago. Thanks for this!
What a great post! I want to make some!!! I would like to invite you to share this post at the Patriotic Party Link Up or any other patriotic themed posts you may have. https://followtheyellowbrickhome.com/its-a-patriotic-party/
You can also link up your posts weekly at Thursday Favorite Things! Thursday at 9:00 a.m. EST-Saturday Midnight
I will be picking up some wiffle balls and pretty napkins this week. Thanks for the inspiration. Have a happy Fourth of July!
Great project. Dollar Tree is such a wonderful resource for craft supplies. The orbs are so pretty.
Looks fabulous!
Your DIY works always nice and cost effective, I’m fan of your work. Thanks for sharing another nice work.
These look great, Shirley! I’m always impressed with what can be made using napkins. Love that you found the balls to use at the dollar store keeping the cost low. What a pretty display this is. Pinning.