Gift Wrapping Tips For A Professional Look
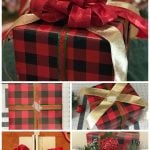


Take your gift wrapping to a new level with our simple and elegant tips to create beautifully wrapped gifts.
Welcome to Day 9 of the Fourth Annual 12 Days of Christmas Series!
We have teamed up with 50 plus bloggers to bring you a oodles of DIY Ideas and Recipes to make your holiday season merrier. There are 12 different posts in the series so be sure to see them all for Christmas ideas to make your holiday season brighter.
It’s Day 9 and we are sharing How To Gift Wrapping Ideas

The only way to make a beautiful Christmas tree any better is to place beautifully wrapped gifts underneath. Use these simple tips to make an ordinary wrapped gift look beautiful.
You will need a few simple supplies to create beautifully wrapped gifts for any occasion especially for Christmas.
- Pretty gift wrap paper
- Ribbons
- Bowdabra for making matching bows
- Scissors
- Tape
- Double Sided Tape
- Hot Glue gun
- Hot Glue

Begin with your wrapped gift. While there is nothing wrong with Dollar Store paper, I prefer the good kind which is thicker and doesn’t rip every time you try fold it over.
Yes it does cost more but there is so much more on the roll and it’s much better to work with.

Now add your choice of ribbon as shown. This is where double sided tape comes in handy. Do not worry about the tape being seen. We will cover that with a pretty bow.

Next use a wider ribbon to criss cross on top of the first ribbon as shown. More double tape will hold your ribbons in place.
I like to cut the ribbon tails long enough to hang off the sides of the box sometimes and sometimes just leave the tails on top of the box. Creativity is your toy while wrapping gifts.

Dovetail the ends of your ribbons for a dressier look. It’s super easy. Just fold the end of the ribbon in half then cut away from center to edge. Scissor will cut wired ribbon easily.

Add Floral Picks or Baubles
I like to keep floral picks on hand to enhance the bows when wrapping gifts. The best way to create a little stash of these is to pick them up on clearance at the end of every season. Try to select the one’s you can take apart and use the pieces separately so you stretch you buck even more.
Using my craft room wire cutters, I snipped the pieces apart and have enough to do 4 or 5 gifts depending on how I use them. I may use the pine branches together on one gift. Those will be pretty on a Christmas gift.

My newest craft room toy is a Bowdabra which I am currently crushing on. It is like having an extra hand when bow making. For this particular gift I made a small bow to fit the top of the box. Each side has five loops then I added a center loop which is why both tails are on the left.
See my Facebook Live video using the Bowdabra here
After making your bow in the Bowdabra, you’ll fluff it out and pull the ends and tails around as you like.
Also See: My Christmas Tree Topper bow made using the Bowdabra

Attach The Bow To The Gift Wrapped Package
After making my bow and shaping it, I used Hot Glue to hold it into place on the top of the gift. Then also using hot glue, I added the sparkle ball to the center of the bow.
Now my simple wrapped gift has become a Pretty Present to place under the tree.


I feel like making pretty presents is part of the gift to the recipient. We all get to enjoy the beautiful paper and bows. Use these tips for any season or occasion to create Pretty Presents for you friends and family.
Scroll down for many more Pretty Gift Wrapping Ideas!


I have not yet gotten a Bowdabra! I need one. Your packages look great Shirley! Pinned! #MM
Soooo pretty! I really do need to get one of those Bowdabras.
Such a pretty present, I love the paper you chose and the bowdabra sounds like a lot of fun!
That is beautiful! I too prefer the more expensive paper; I feel like in the end I’m wasting so much less of it that’s it’s totally worth it.
You sure are mastering that new bowdabra! Your gift is beautiful and definitive proof to always tie your own ribbon into bows. Pretty package.