Easy To Make Christmas Bell Fabric Ornament
How To Sew Your Own Christmas Bell Fabric Ornament using a vintage sewing pattern. It’s easy y’all. Don’t be intimidated by a sewing pattern.

Brocade fabric makes gorgeous old style Christmas ornaments for the tree. This simple little Bell ornament pattern is really easy to sew. It’s a fun little DIY Christmas project and you get a unique handmade ornament for your tree.
This article contains affiliate links
Supplies for Fabric Christmas Bell Ornament
- 1/4 yard fabric
- Matching thread
- Vintage McCall’s pattern 7225
- Shiny silver ribbon (Hobby Lobby)
- Matching frilly ribbon for bottom of bell (Hot Pink from Hobby Lobby)
- Blingy Button (Sewology from Hobby Lobby)
- Clear stick on jewels
- Pillow stuffing
- E6000 glue
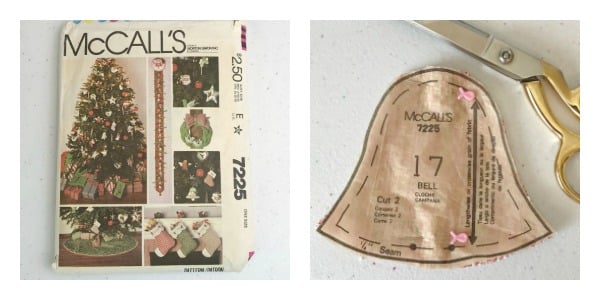
I love vintage patterns and was thrilled to find this bell pattern in my stash! It is McCalls 7225 which originally cost only $2.50! Patterns are much more expensive now!
This is a pattern I can actually follow! You can read about my learning to sew struggles in this post about how it took me a year to make an apron for my daughter.

A fun trip to Hobby Lobby netted all of the bells and whistles! Sorry, I had to make a bell joke!
The Fabric
You could easily select a Christmas fabric for your bell but I wanted to use this pink brocade as my jewel tone along with some pretty ribbon and the blingy button! My fabric actually came from a thrift store vintage jacket I came across.
Bell Clapper
The blingy button I selected is just gorgeous! I wanted to add it to both sides as the clapper but it was too heavy so I added it to the top of the bell ornament. You have to have something to catch the flicker of the lights on the tree and the button along with the silver ribbon will serve well in that regard.
Making The Ornament
I used my sewing machine but this fabric bell ornament can easily be sewn by hand.
First, I doubled my fabric and cut out the bell after pinning it down.
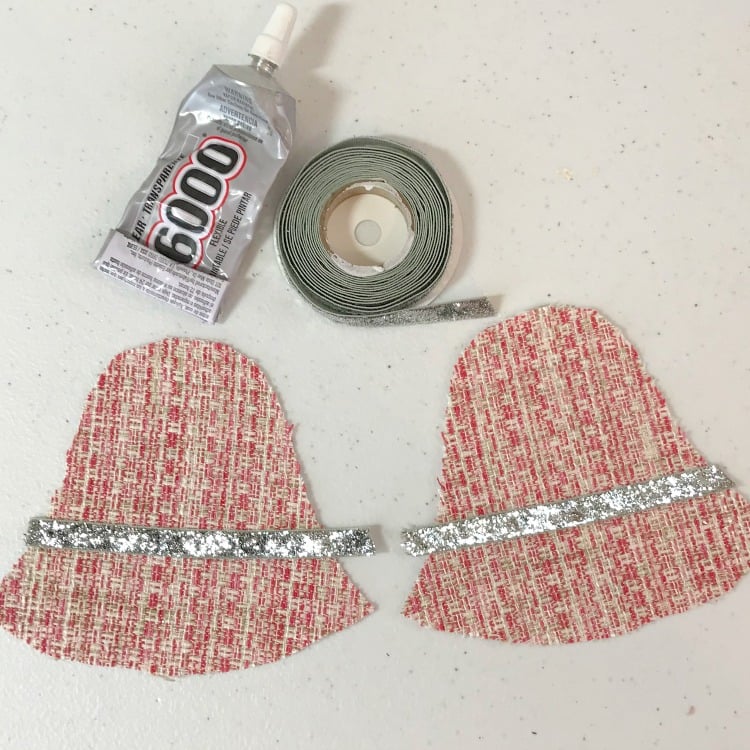
Adding the silver ribbon
I placed both pieces of fabric side by side for matching the alignment of the ribbon. To double check, I sat one piece on top of the other. Once I was satisfied the ribbon matched on both pieces, I glued it down using a dab of E6000.

This is the tricky part!
Ribbon Edge
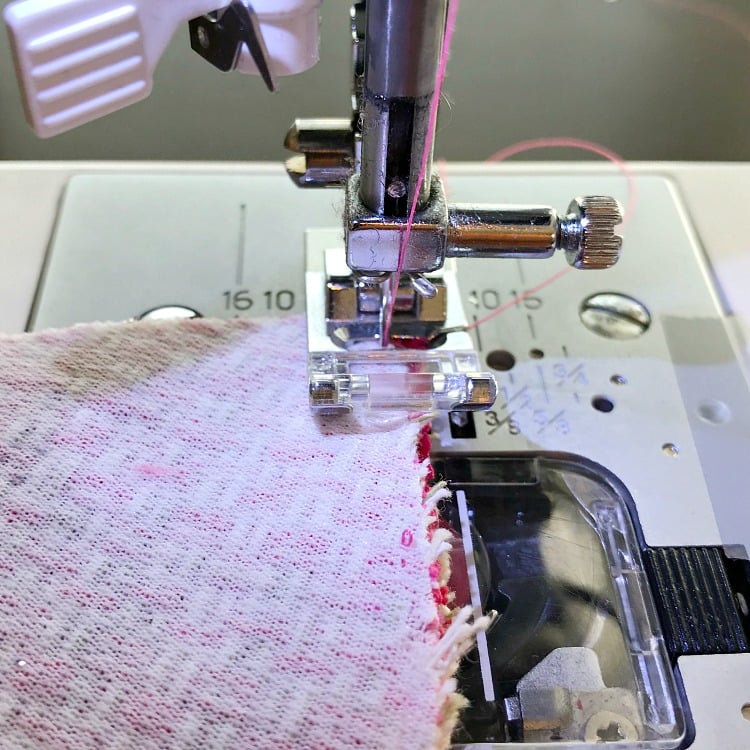
I hand stitched the hot pink ribbon first because this is such a tiny space to work with. The hand stitching kept it in place for sewing on the machine.
Notice that you have to sew the ribbon onto the right side of the fabric with the bottom edge of the ribbon facing up. Once you sew the two sides of the ornament together and turn it out, the ribbon and the clapper will be on the outside bottom.
Bell Clapper
Cut a small piece of the silver ribbon to use for the bell clapper. Fold in half and stitch into place on the right side of fabric facing inward on top of the ribbon.
Place right sides together and pin the edges to sew the bell together on the machine.
If you look close, you can see a couple of my hand stitches. The ribbon is too small for catching with pins for the sewing process therefore the hand stitching worked like a charm on the bottom edge.
Be sure to leave a top edge open for adding the hanger and the stuffing as shown in the photo below.
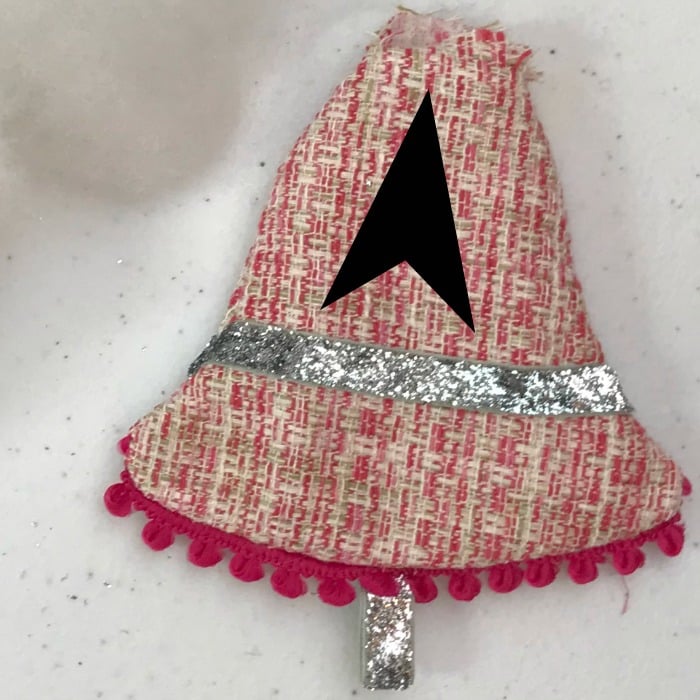
After sewing the two sides together on the machine, turn the bell out. Now your pretty ribbon edge and bell clapper will be visible.
Adding the Stuffing
Now add the amount of pillow stuffing which will achieve the fullness of your liking. It doesn’t take much but you would be surprised how much you can get in there!
Next cut a piece of the pretty silver ribbon to make the ornament hanger. Fold in half and stitch into place as you close the top opening.
Closing the bell
I hand stitched the closure in this area after stuffing the ornament. You can begin hand stitching from the inside out to sort of hide the sewing.
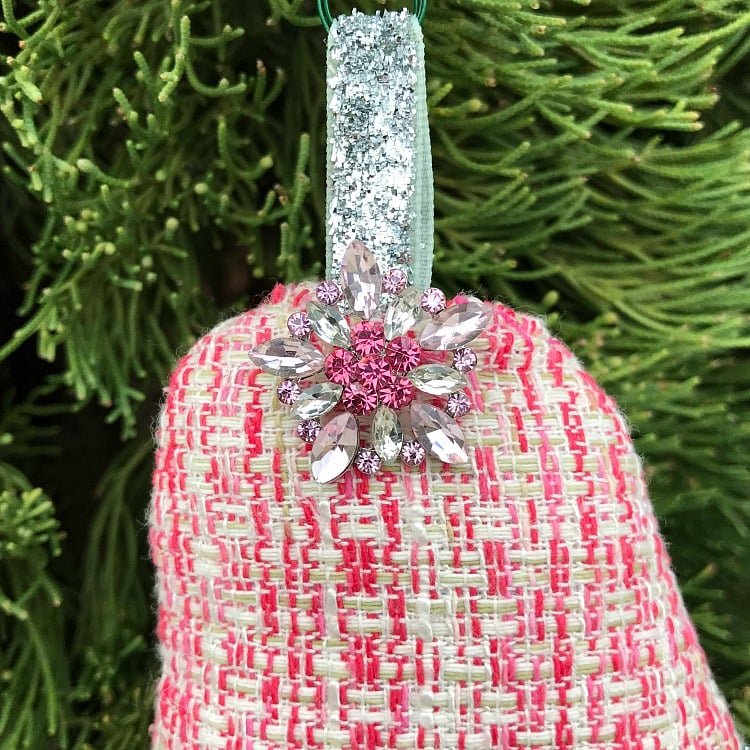
Finally I glued a couple of shiny jewels onto the bottom of the clapper where I had originally hoped the buttons would go. The buttons were far too heavy and didn’t hang properly. Thank goodness I had these pretty little jewels I keep finding uses for in my craft room!
The finishing touch was to sew on the blingy button I found at Hobby Lobby. It is always nice for ornaments to have something shiny about them to shimmer in the lights of the Christmas tree. Plus this button looks a lot like an old fashioned broach worn on a jacket so it’s my nod to my vintage fabric source.
Make your own Fabric Christmas Bell ornament using supplies of your choosing. You can sew by hand if you prefer, not a problem. These make nice heirloom gifts for family too.


More DIY Christmas
Easy Painted Wood Slice Ornaments In Bright Colors -Cricket project
Make This Dollar Store Gift Elf Cam Mug Using Cricut -Cricket project
Make This Red & White Pom Pom Mini Wreath Ornament
Mini Terracotta Pot Snowman Kids Craft
DIY Paper Bag Christmas Countdown Calendar
DIY Mini Wreath for Kitchen Cabinets


What a lovely collection of decorations and I love your little bell
I love this ornament. It can be made to go with so many styles. I also like the idea that it won’t break, not that I drop ornaments or anything 🙂
Love the fabric you choose…such a pretty project!